
จาก สร้าง 2-node Kubernetes cluster เรามี control plane ของ cluster เป็น Linux แล้ว ในตัวอย่างนี้เรามาเพิ่ม Windows worker node เพื่อใช้รัน Windows container app กันต่อนะครับ
Prepare the Windows node
บน Windows node เปลี่ยน time zone ให้ตรงกับ Linux control plane node
แล้วปิด Windows firewall (ใน production ก็ไม่ควรปิดนะครับ)
จากนั้นติดตั้ง containers feature และ Hyper-V role แล้ว restart เครื่อง
Install-WindowsFeature -Name containers
Install-WindowsFeature -Name Hyper-V -IncludeManagementTools -Restart
Install containerd
หลังจาก restart กลับมาก็ติดตั้ง containerd (container runtime) จาก Installing containerd on Windows
# If containerd previously installed run:
Stop-Service containerd

# Download and extract desired containerd Windows binaries
$Version="1.7.13"	# update to your preferred version
$Arch = "amd64"	# arm64 also available
curl.exe -LO https://github.com/containerd/containerd/releases/download/v$Version/containerd-$Version-windows-$Arch.tar.gz
tar.exe xvf .\containerd-$Version-windows-amd64.tar.gz

# Copy
Copy-Item -Path .\bin -Destination $Env:ProgramFiles\containerd -Recurse -Force

# add the binaries (containerd.exe, ctr.exe) in $env:Path
$Path = [Environment]::GetEnvironmentVariable("PATH", "Machine") + [IO.Path]::PathSeparator + "$Env:ProgramFiles\containerd"
[Environment]::SetEnvironmentVariable( "Path", $Path, "Machine")
# reload path, so you don't have to open a new PS terminal later if needed
$Env:Path = [System.Environment]::GetEnvironmentVariable("Path","Machine") + ";" + [System.Environment]::GetEnvironmentVariable("Path","User")

# configure
containerd.exe config default | Out-File $Env:ProgramFiles\containerd\config.toml -Encoding ascii
# Review the configuration. Depending on setup you may want to adjust:
# - the sandbox_image (Kubernetes pause image)
# - cni bin_dir and conf_dir locations
Get-Content $Env:ProgramFiles\containerd\config.toml

# Register and start service
containerd.exe --register-service
Start-Service containerd
Install Calico CNI
สร้าง folder ก่อน
mkdir c:\k
mkdir 'C:\Program Files\containerd\cni\bin'
copy kubeconfig file มาไว้ที่ Windows node เพื่อให้สามารถ access Kubernetes cluster ได้
scp jakapong@172.23.163.83:/home/jakapong/.kube/config c:\k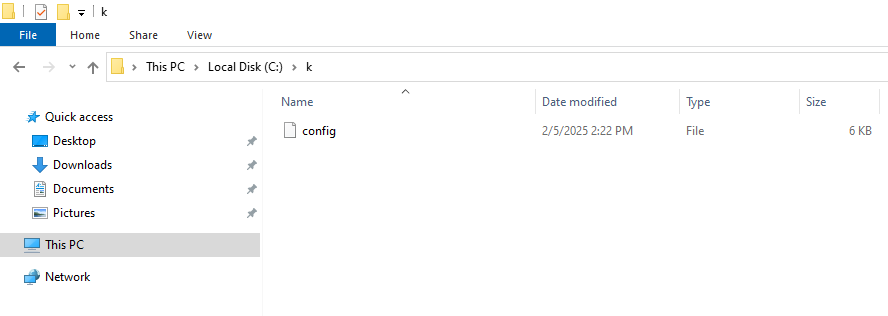
แล้วติดตั้ง Calico
Invoke-WebRequest https://github.com/projectcalico/calico/releases/download/v3.29.1/install-calico-windows.ps1 -OutFile c:\install-calico-windows.ps1

.\install-calico-windows.ps1 -KubeVersion 1.32.1 -CalicoBackend vxlan

Get-Service -Name CalicoNode
Get-Service -Name CalicoFelix
Install Kubernetes tools
C:\CalicoWindows\kubernetes\install-kube-services.ps1

Start-Service -Name kubelet
Start-Service -Name kube-proxy

Stop-Service -Name kubelet

Get-Service -Name kubelet
Get-Service -Name kube-proxy
Join the Windows node to a Kubernetes cluster as a worker node
บน Linux control plane สร้างคำสั่งที่ใช้ในการ join node เข้า Kubernetes cluster
kubeadm token create --print-join-command
นำคำสั่งกลับมารันบน Windows node
kubeadm join — token <token> <control-plane-host>:<control-plane-port> — discovery-token-ca-cert-hash sha256:<hash>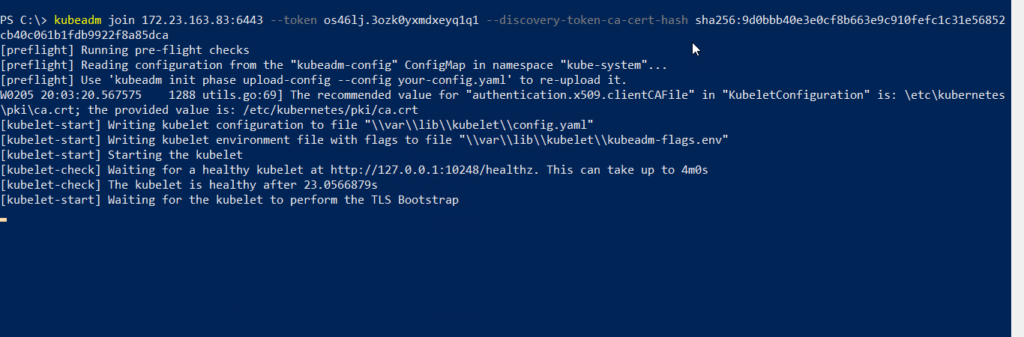
หมายเหตุ: ตอนรันคำสั่ง อาจจะค้างตรงนี้นาน จน error ยังไงเราลองข้ามปัญหานี้ไปทดสอบรัน Windows container ก่อนได้เลยนะครับ ว่าผ่านไหม แล้วค่อยไปค้นหาวิธีการแก้ error นี้จาก Internet ภายหลัง
ที่ control plane ดู nodes
kubectl get nodesตอนนี้เรามี Windows worker node ใน Kubernetes cluster แล้วนะครับ

Test
จาก Guide for Running Windows Containers in Kubernetes
สร้าง win-webserver.yaml
---
apiVersion: v1
kind: Service
metadata:
  name: win-webserver
  labels:
    app: win-webserver
spec:
  ports:
    # the port that this service should serve on
    - port: 80
      targetPort: 80
  selector:
    app: win-webserver
  type: NodePort
---
apiVersion: apps/v1
kind: Deployment
metadata:
  labels:
    app: win-webserver
  name: win-webserver
spec:
  replicas: 2
  selector:
    matchLabels:
      app: win-webserver
  template:
    metadata:
      labels:
        app: win-webserver
      name: win-webserver
    spec:
     containers:
      - name: windowswebserver
        image: mcr.microsoft.com/windows/servercore:ltsc2019
        command:
        - powershell.exe
        - -command
        - "<#code used from https://gist.github.com/19WAS85/5424431#> ; $$listener = New-Object System.Net.HttpListener ; $$listener.Prefixes.Add('http://*:80/') ; $$listener.Start() ; $$callerCounts = @{} ; Write-Host('Listening at http://*:80/') ; while ($$listener.IsListening) { ;$$context = $$listener.GetContext() ;$$requestUrl = $$context.Request.Url ;$$clientIP = $$context.Request.RemoteEndPoint.Address ;$$response = $$context.Response ;Write-Host '' ;Write-Host('> {0}' -f $$requestUrl) ;  ;$$count = 1 ;$$k=$$callerCounts.Get_Item($$clientIP) ;if ($$k -ne $$null) { $$count += $$k } ;$$callerCounts.Set_Item($$clientIP, $$count) ;$$ip=(Get-NetAdapter | Get-NetIpAddress); $$header='<html><body><H1>Windows Container Web Server</H1>' ;$$callerCountsString='' ;$$callerCounts.Keys | % { $$callerCountsString+='<p>IP {0} callerCount {1} ' -f $$ip[1].IPAddress,$$callerCounts.Item($$_) } ;$$footer='</body></html>' ;$$content='{0}{1}{2}' -f $$header,$$callerCountsString,$$footer ;Write-Output $$content ;$$buffer = [System.Text.Encoding]::UTF8.GetBytes($$content) ;$$response.ContentLength64 = $$buffer.Length ;$$response.OutputStream.Write($$buffer, 0, $$buffer.Length) ;$$response.Close() ;$$responseStatus = $$response.StatusCode ;Write-Host('< {0}' -f $$responseStatus)  } ; "
     nodeSelector:
      kubernetes.io/os: windows
สั่ง deploy
kubectl apply -f win-webserver.yaml
kubectl get pods -o wide
image ที่ใช้ใน yaml ค่อนข้างใหญ่ จะใช้เวลา pull image นานนิดนึงนะครับ

ลองดูว่ากำลัง pull image อยู่
kubectl describe pod win-webserver-7cb7f6ffb6-ll874
รอจน pull image เสร็จ Windows container app ก็จะถูก start ขึ้นมา

สถานะ Windows container เป็น running

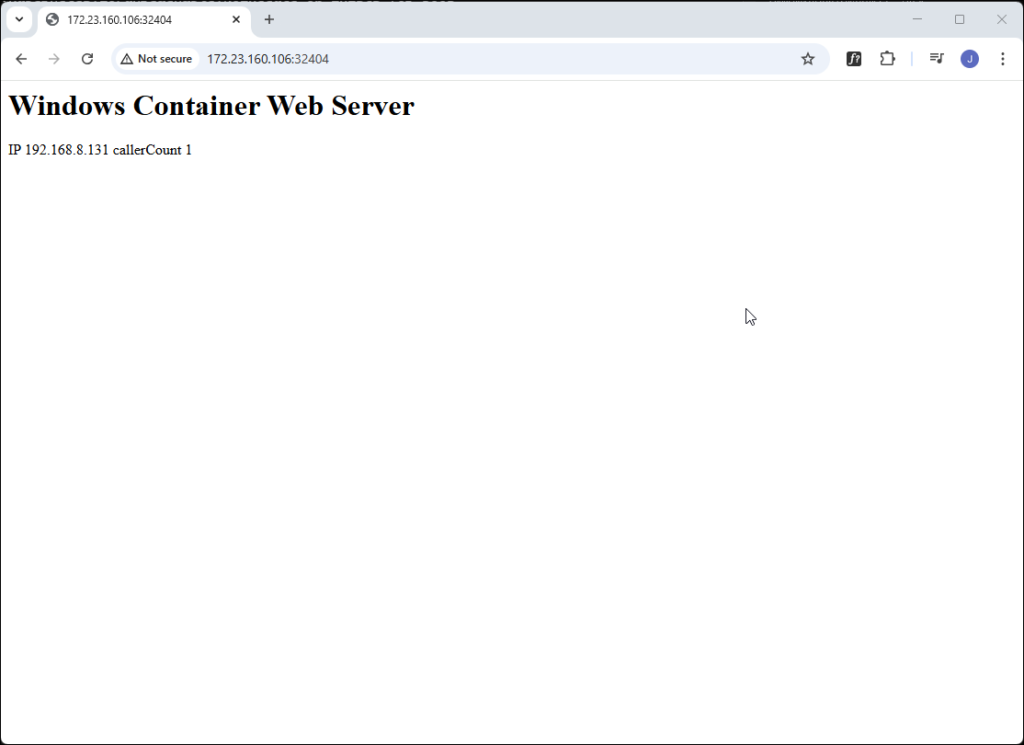
ดู map port

ดู IP ของ Windows node

แล้วลองทดสอบ access Windows app
ถ้าเข้าได้แบบนี้ ก็แสดงว่าเรียบร้อยแล้วนะครับ
รายการอ้างอิง